After selecting all of the parts needed for your build the next step is to assemble the PC.
Step 1
The first step in the building process it to take off the panels on the case that you will be using.
Step 2
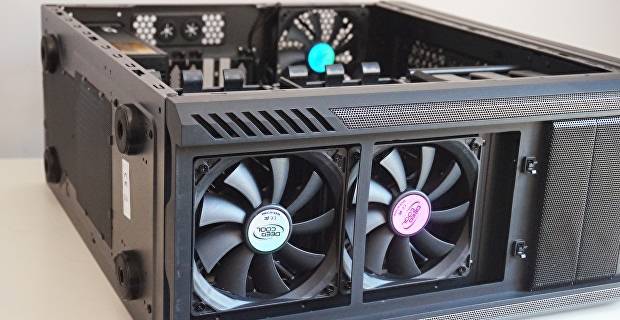
Once you have take apart the case and it is completly empty this is the time to install any fans that you may have bought. With the case being having nothing inside this is the ideal time to insert the fans so that you don't have to work around other parts and have them getting in the way. The idea set up for the fans is to have at least one fan in the front bringing in cool air and one on the back blowing the hot air out.
Step 3
After the fans are installed the next thing to do is insert the motherboard but before you put anything into the PC some parts need to be installed onto the motherboard itself.

Step 3.1
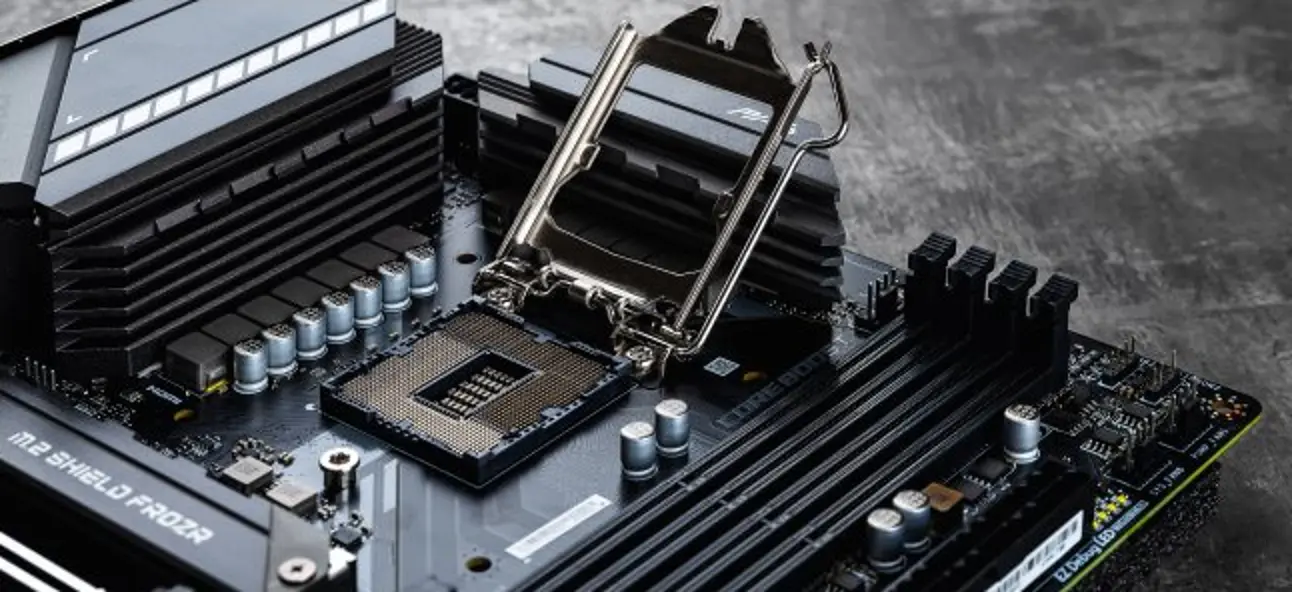
With the motherboard "naked" of anyother parts the easiest thing to install and arguably the most important part is the processor or CPU.
Now depending on what CPU you have chosen the following steps could be slightly differnet. Locate the CPU spot on the motherboard which has a lever on it to open it. Some can be spring loaded to be carefull opening it. One the renteiton arm is out of the way place the CPU into the slot matching the small triangle at the bottom of the CPU with the one on the motherboard. Once that is done lower the retention arm back down and the CPU is installed.
Step 3.2
Now that the CPU has been installed it is time to insert the memory/RAM. Find the memory slots on the motherboard and open the lever on the side of them. When installing memory you install them in series. Meaning that they should be in either the first and third slot or second and fourth it doesn'y matter which two just that they are seperated. When ready to install the memory stick make sure to push down firmly but evenly on the stick so that you don't accidentally break them.

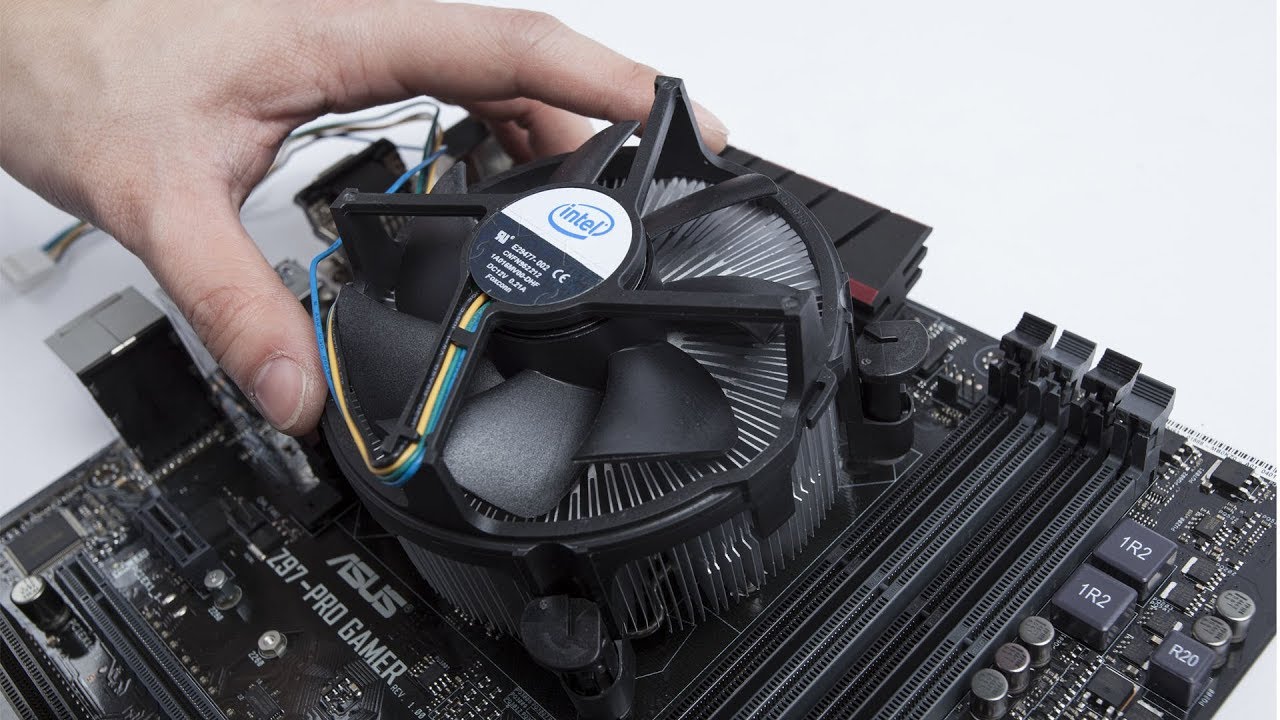
Step 3.3
The next step in preparing the motherboard is to add the CPU cooler. Now depending on your budget and what you bought the cooler can be as simple as a heat sink with a fan or go as far as a water cooler but for now we will only work with the normal heat sink. There should be a small tube of thermal paste used to adhere the cooler to the CPU. Put a small amount of paste on top of the CPU and place the cooler on top pressing down with slight pressure. After applying the cooler your motherboard should be complete (Unless you have an SSD).
Step 3.4
Now that the motherboard is complete it is time to give the PC somewhere to store all of the data. The two options for hard drives are either a disk drive or an SSD. SSD are going to be a little more expensive but you get what you pay for by it being faster and smaller. Disk drives are still a great option though if you can't get your hands on an SSD. To install an SSD you need to locate the spot on the motherboard where the SSD goes. The manuel of the motherboard should show where this is if you have trouble finding it. Stick the SSD into that slot and it should be installed as simple as that. Now for a disk drive there should be a few slots near the front of the PC case where hard drives will sit. Also depending on the case some have quick release slides for easier instillation of the hard drive but if yours is older it should come with some metal bars that you can slide into place. Once you have located the slots take your hard drive and attach the proper slides to in and slide it into the slot and just like that you have installed the memory.

Step 4
The most important part of the PC is the power supply because thats what makes everything work. The installation of the power supply is pretty simple. Look near the back of the case on the bottom and you should find a vent facing down. Now take you power supply and find where the fan on it is and place the fan facing down toward the vent. Screw in the power supply and you are done.

Step 5
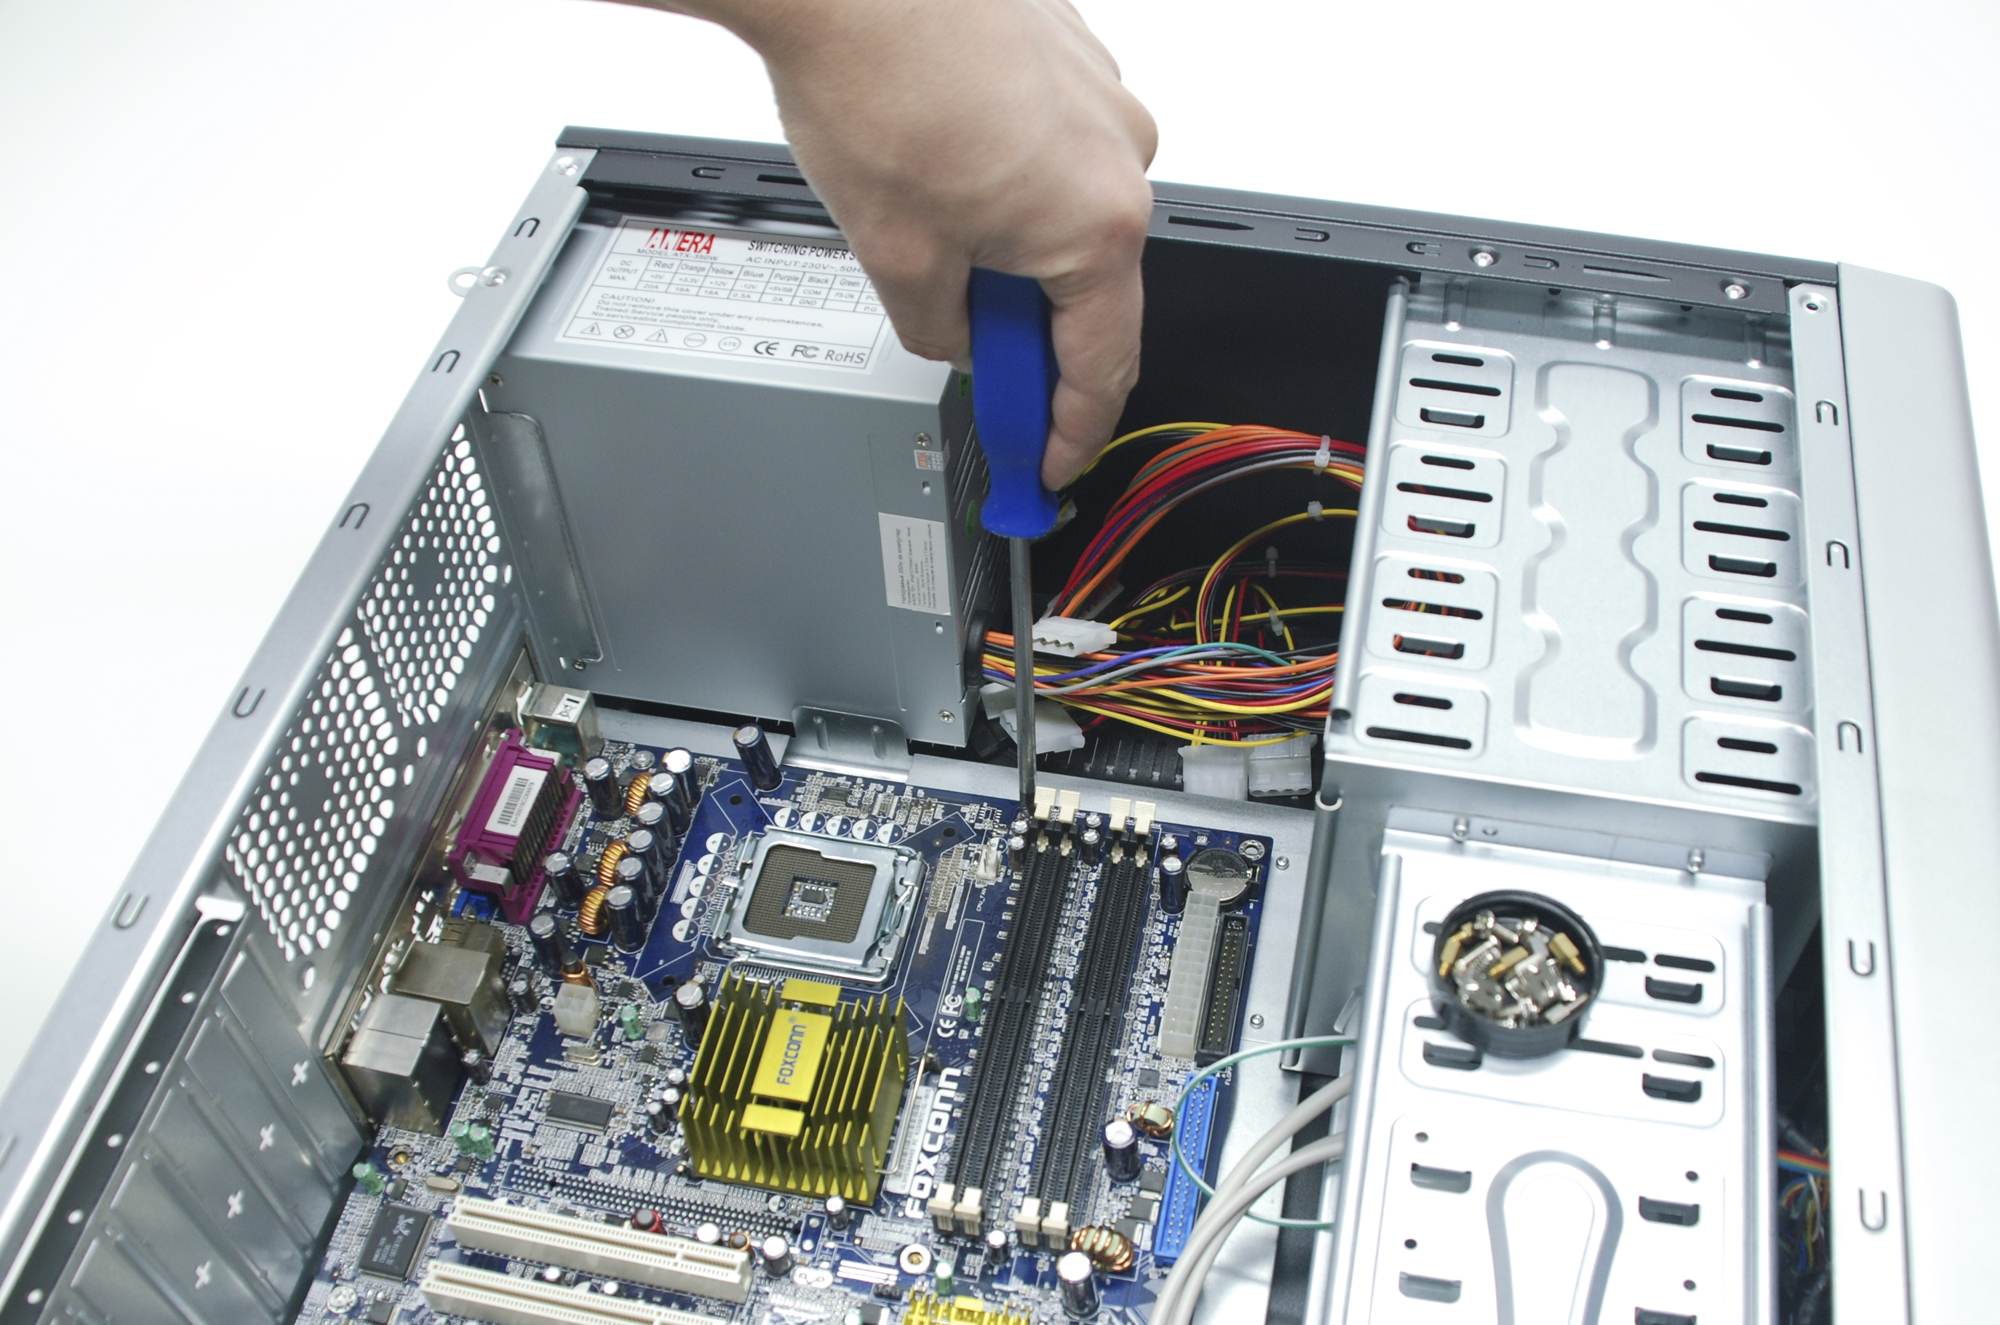
The second to last step of building the PC it to now put the mother board into the case. There should be a back plate from the case used to mount the motherboard. Screw in the motherboard and slide it into the case.
Step 6
The final step in building your PC is plugging everything in. Now the instructions for this are different with every PC because of the differneces between all of them. The power supply should have some with a book that tells you exactly where all of the wires should connect to. Follow those instructions and just like that your PC is finished.